Data Layers
Data layers are a mechanism for collecting responses in waves. Each time you reopen a survey for data collection, you can create a new layer — and all new responses will be recorded in it separately from previous ones. This lets you track how opinions change over time.
This is useful for regular satisfaction tracking, quarterly NPS studies, or measuring the effect of product changes.
How layers work
Every survey always has at least one layer — it is created automatically when the survey is opened for the first time. New layers are created manually when reopening the survey.
At any moment, one layer is active for collection — all new responses are recorded into it; this is always the most recently created layer. The other layers are available for viewing their statistics only.
You can switch between layers and manage them in the left panel of the Results section.
Creating a new layer
When reopening a survey that already has collected responses, a modal window appears asking whether to continue collecting into the current layer or create a new one.
To start a new collection wave, enable the "Create a new data layer" checkbox and click "Yes, open". The new layer receives a default name with a sequential number — you can rename it at any time.
If you leave the checkbox off, new responses will be added to the existing active layer.
Managing layers
In the left panel of the Results section, the Data layers block shows the most recent layers directly — each with its response count, and the currently displayed layer highlighted. Click a layer to view its statistics: the main area loads the data of the selected layer. This does not change the collection layer — new responses are always recorded into the most recently created layer. To manage all layers, click the settings icon (sliders) in the block header — the layer manager opens.
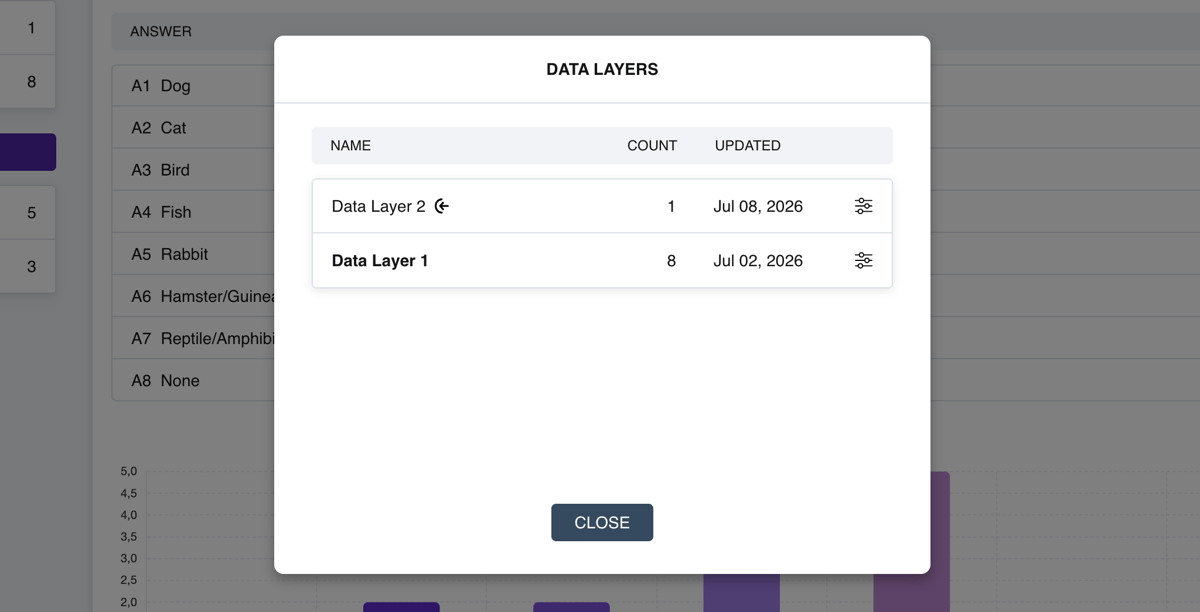
The layer manager
The manager shows a list of all layers. Each layer has:
- Name of the layer
- Active layer icon — shows which layer new responses are currently being recorded into
- Last update date — the date of the most recently received response
Click a layer row to switch the statistics display to that layer. Click the layer's settings icon to rename or delete it.

Filtering by audience within a layer
Below the layers, the left panel shows a list of audiences. Each audience has its own colored checkbox and a response count. Toggle the ones you need — the statistics in Summary data and Individual review will update automatically.
For more on working with audiences, see the Audiences article.