Audiences
Audiences allow you to segment respondents by traffic source. Each audience gets its own unique survey link, and all distribution tools (link, QR code, embed code) are tied to the selected audience. This lets you track in statistics where each respondent came from.
Audience management takes place in the left panel of the Publish tab.
Creating and configuring
By default, each survey has one audience. You can create up to 5 audiences by clicking the + button in the audiences section.
Each audience has its own unique color for visual distinction. When you select an audience in the left panel, the colored lines on the distribution cards are painted in the color of the selected audience.
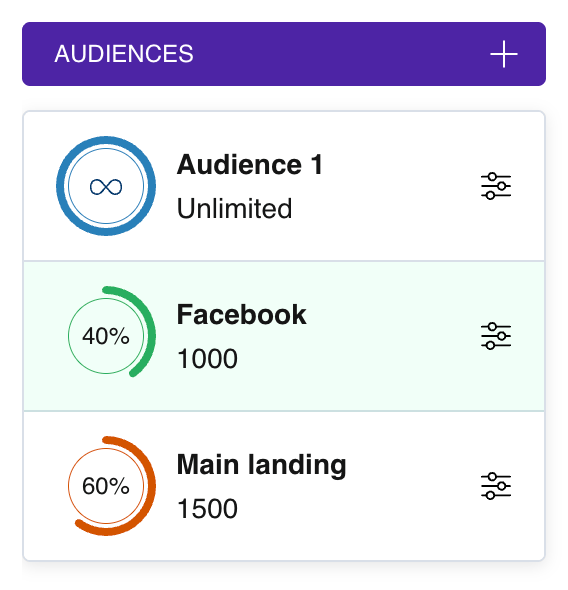
The audiences panel on the Publish tab
Audience settings
Click the settings button (slider icon) next to the audience. Available parameters:
- Audience name — a custom name to identify the source (for example, "Facebook", "Newsletter", "QR at event"). The name is written to the system variable ps_audience and is available in survey logic.
- Respondent limit — if enabled, the survey will automatically close for this audience when the specified number of responses is reached.
- Remove audience — deletes the audience. The only audience cannot be deleted.
Audience indicator
The audience icon displays two states:
- ∞ — no limit set, response collection is unlimited.
- Progress ring — when a limit is set, displays the share of respondents requested for this audience relative to the total survey limit.
Usage example
You launch a survey and want to understand which channel brings more respondents. Create three audiences: "Social media", "Email", and "Website". Share each audience's link in the corresponding channel. In statistics, you will see how many responses came from each source and can filter data by audience.