How a respondent takes a survey
Understanding the respondent experience helps you create surveys that are easy and pleasant to complete. This article covers everything a respondent sees and does from the first screen to the final page.
Accessing the survey
A respondent reaches the survey via a direct link, QR code, or an embedded widget on a website. If the survey is protected by a PIN code, the welcome page shows a code entry field instead of the Start button.
If the survey has not yet been opened or has already been closed, the respondent sees a page informing them that the survey is unavailable.
Welcome page
The first thing a respondent sees is the welcome page with a logo, cover illustration, heading, and introductory text. At the bottom — a Get Started button and a note about accepting the terms of use.
The welcome page can be disabled in the survey settings — in that case, the respondent goes straight to the first question.
Answering questions
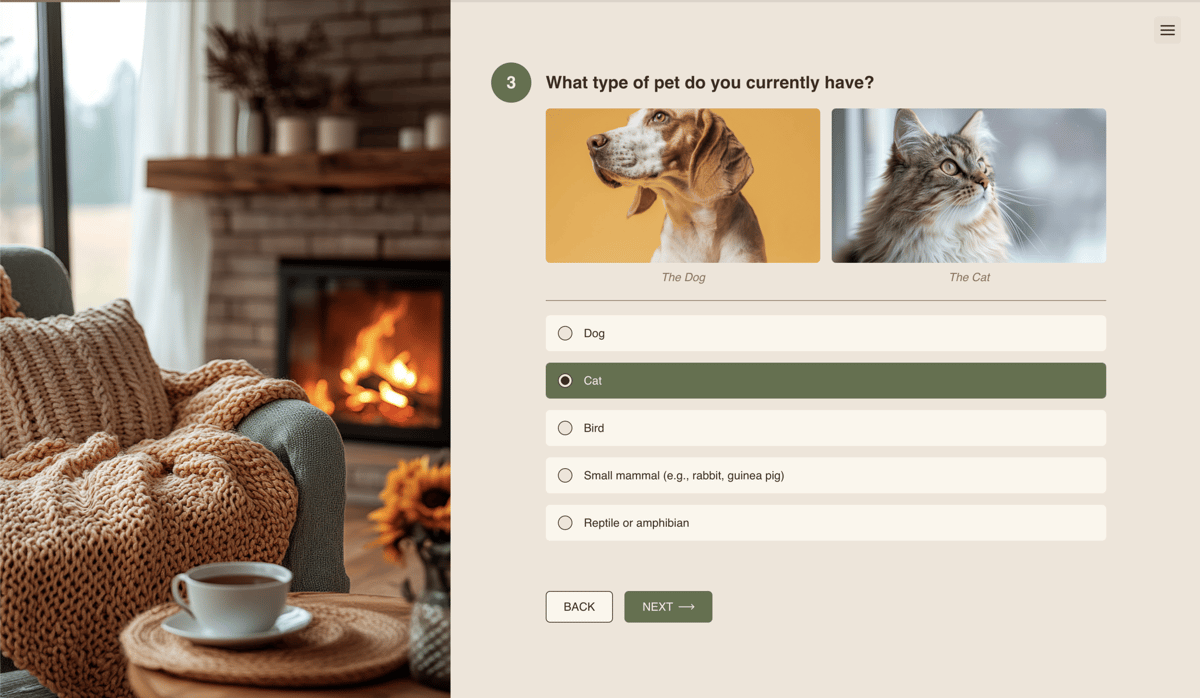
A question in the respondent's view
Questions are shown one per page. Each page displays the question number, heading, description (if set), and the answer element. The question number can be disabled in the survey settings.
A thin progress bar at the top of the page fills as the respondent advances. It appears from the second question onward and can be disabled in the survey settings.
To move to the next question, the respondent clicks Next. If auto-advance is enabled in the settings, questions with a single choice (Yes/No, Single choice, Rating, NPS®, Emotions) advance automatically as soon as an answer is selected.
If the Back button is enabled, the respondent can return to a previous question and change their answer.
Question groups
If questions are combined in a group with the One Page mode enabled, they all appear together on a single screen. The group heading is shown at the top in large text, and questions follow vertically. The respondent answers all of them and clicks Next once.
Survey menu
A menu icon is located in the top right corner. Through it, the respondent can:
- Exit the survey — stop taking the survey early
- Report — flag problematic survey content
- Privacy — read the respondent terms and conditions
Final page
After answering the last question, the respondent lands on the final page with a logo, illustration, thank-you message, and — if configured — links to the author's social networks or a link to the next survey.
If the survey has branching logic with alternative finish pages, the respondent is directed to the one that matches their answers.
Automatic localization
All interface service elements — navigation buttons, hints, system messages — are automatically shown in the language of the survey content. This is a real convenience: the author doesn't need to worry about translating service elements — it all happens automatically. For more details, see the Automatic Localization article.