
First steps after registration
After registration you will find yourself in the Pollsar dashboard. This article will help you navigate the interface and create your first survey.
Dashboard interface
The main navigation element is the sidebar on the left. It can be collapsed (icons only) or expanded (icons with labels). Here is what it contains:
- Pollsar logo — clicking it takes you to the main website.
- Avatar and nickname — clicking opens the profile menu with access to account settings, team, and workspaces.
- Projects — the page with all your surveys. This is your main working area.
- Help — the knowledge base you are reading right now.
- Plans — plan comparison and subscription sign-up.
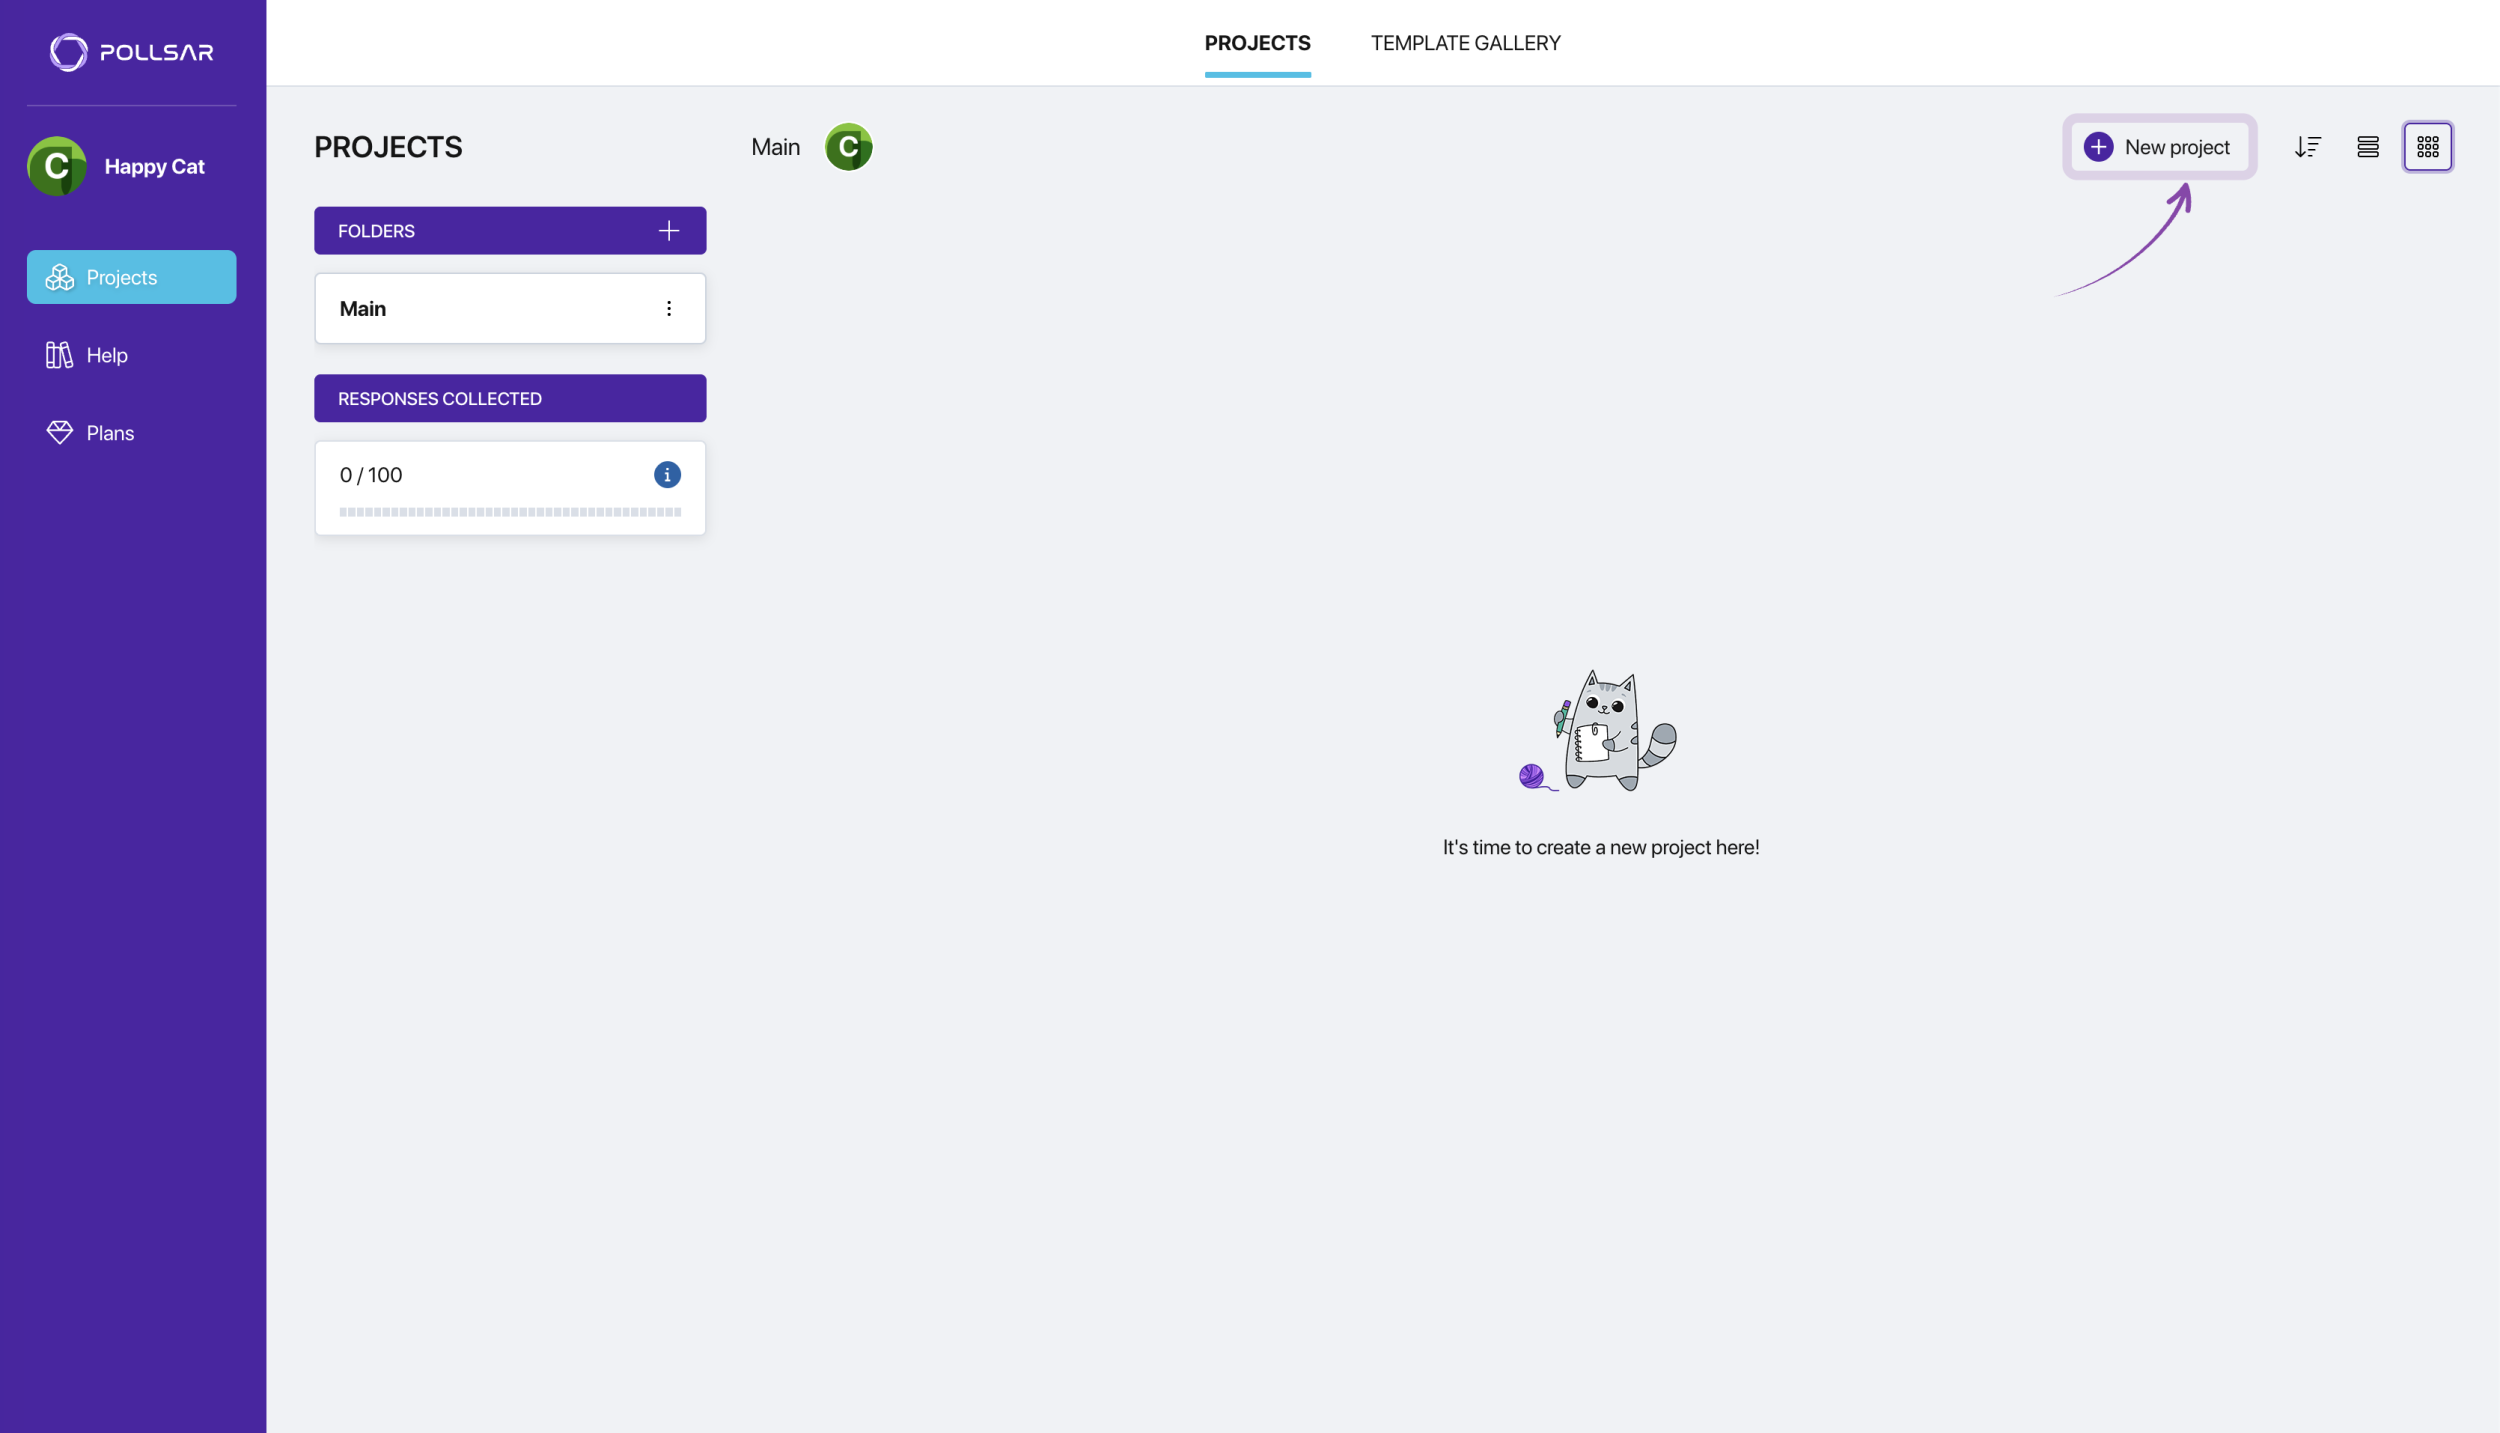
Pollsar dashboard
Profile menu
Click your avatar or nickname in the sidebar to open the profile menu. Here you will find:
- Profile Settings — personal details, security, interface language, notifications.
- Finance — manage your plan and payments.
- Team — inviting members and setting permissions.
- Defaults — survey logo, social media links, response tags.
- Workspaces — switching between your author workspace and teams you have been invited to.
- Log out — sign out of the system.
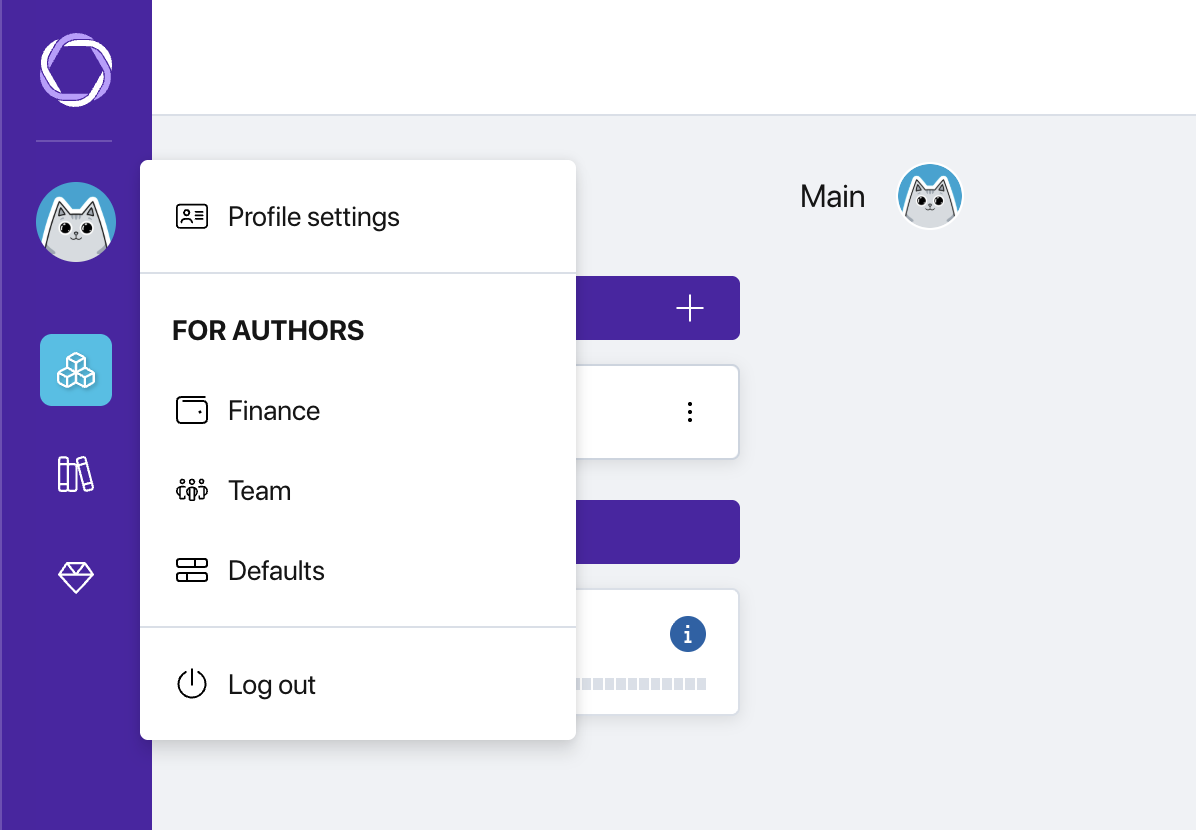
Profile menu
Workspaces
In Pollsar, a single account can operate across several isolated workspaces:
Author Space — your main workspace. This is where you create surveys, analyze results, and connect integrations. It is created automatically on your first login.
Team workspaces — if another user invites you to their team, their workspace will appear in your list. You can be a member of multiple teams at once and switch between them via the profile menu.
How to create your first survey
Pollsar offers three ways to create a survey.
From scratch. On the Projects page, click the + New Survey button. Enter a title, optionally add a note (visible only to you), and choose a decorative illustration for the cover. Click Create — an empty project will appear in the list. Click on it to open the builder and start adding questions.
With AI. In the same creation window, switch to the AI tab and describe in free text what kind of survey you need: the topic, goal, desired tone, question types. Click Create — the AI will generate a complete survey with questions and answer options. You can then edit it in the builder.
From a template. In the top navigation of the Projects page, switch to the Template Gallery tab. Choose a suitable template from the catalog, preview it, and click Use Template. A copy will appear in your projects, ready to be customized.
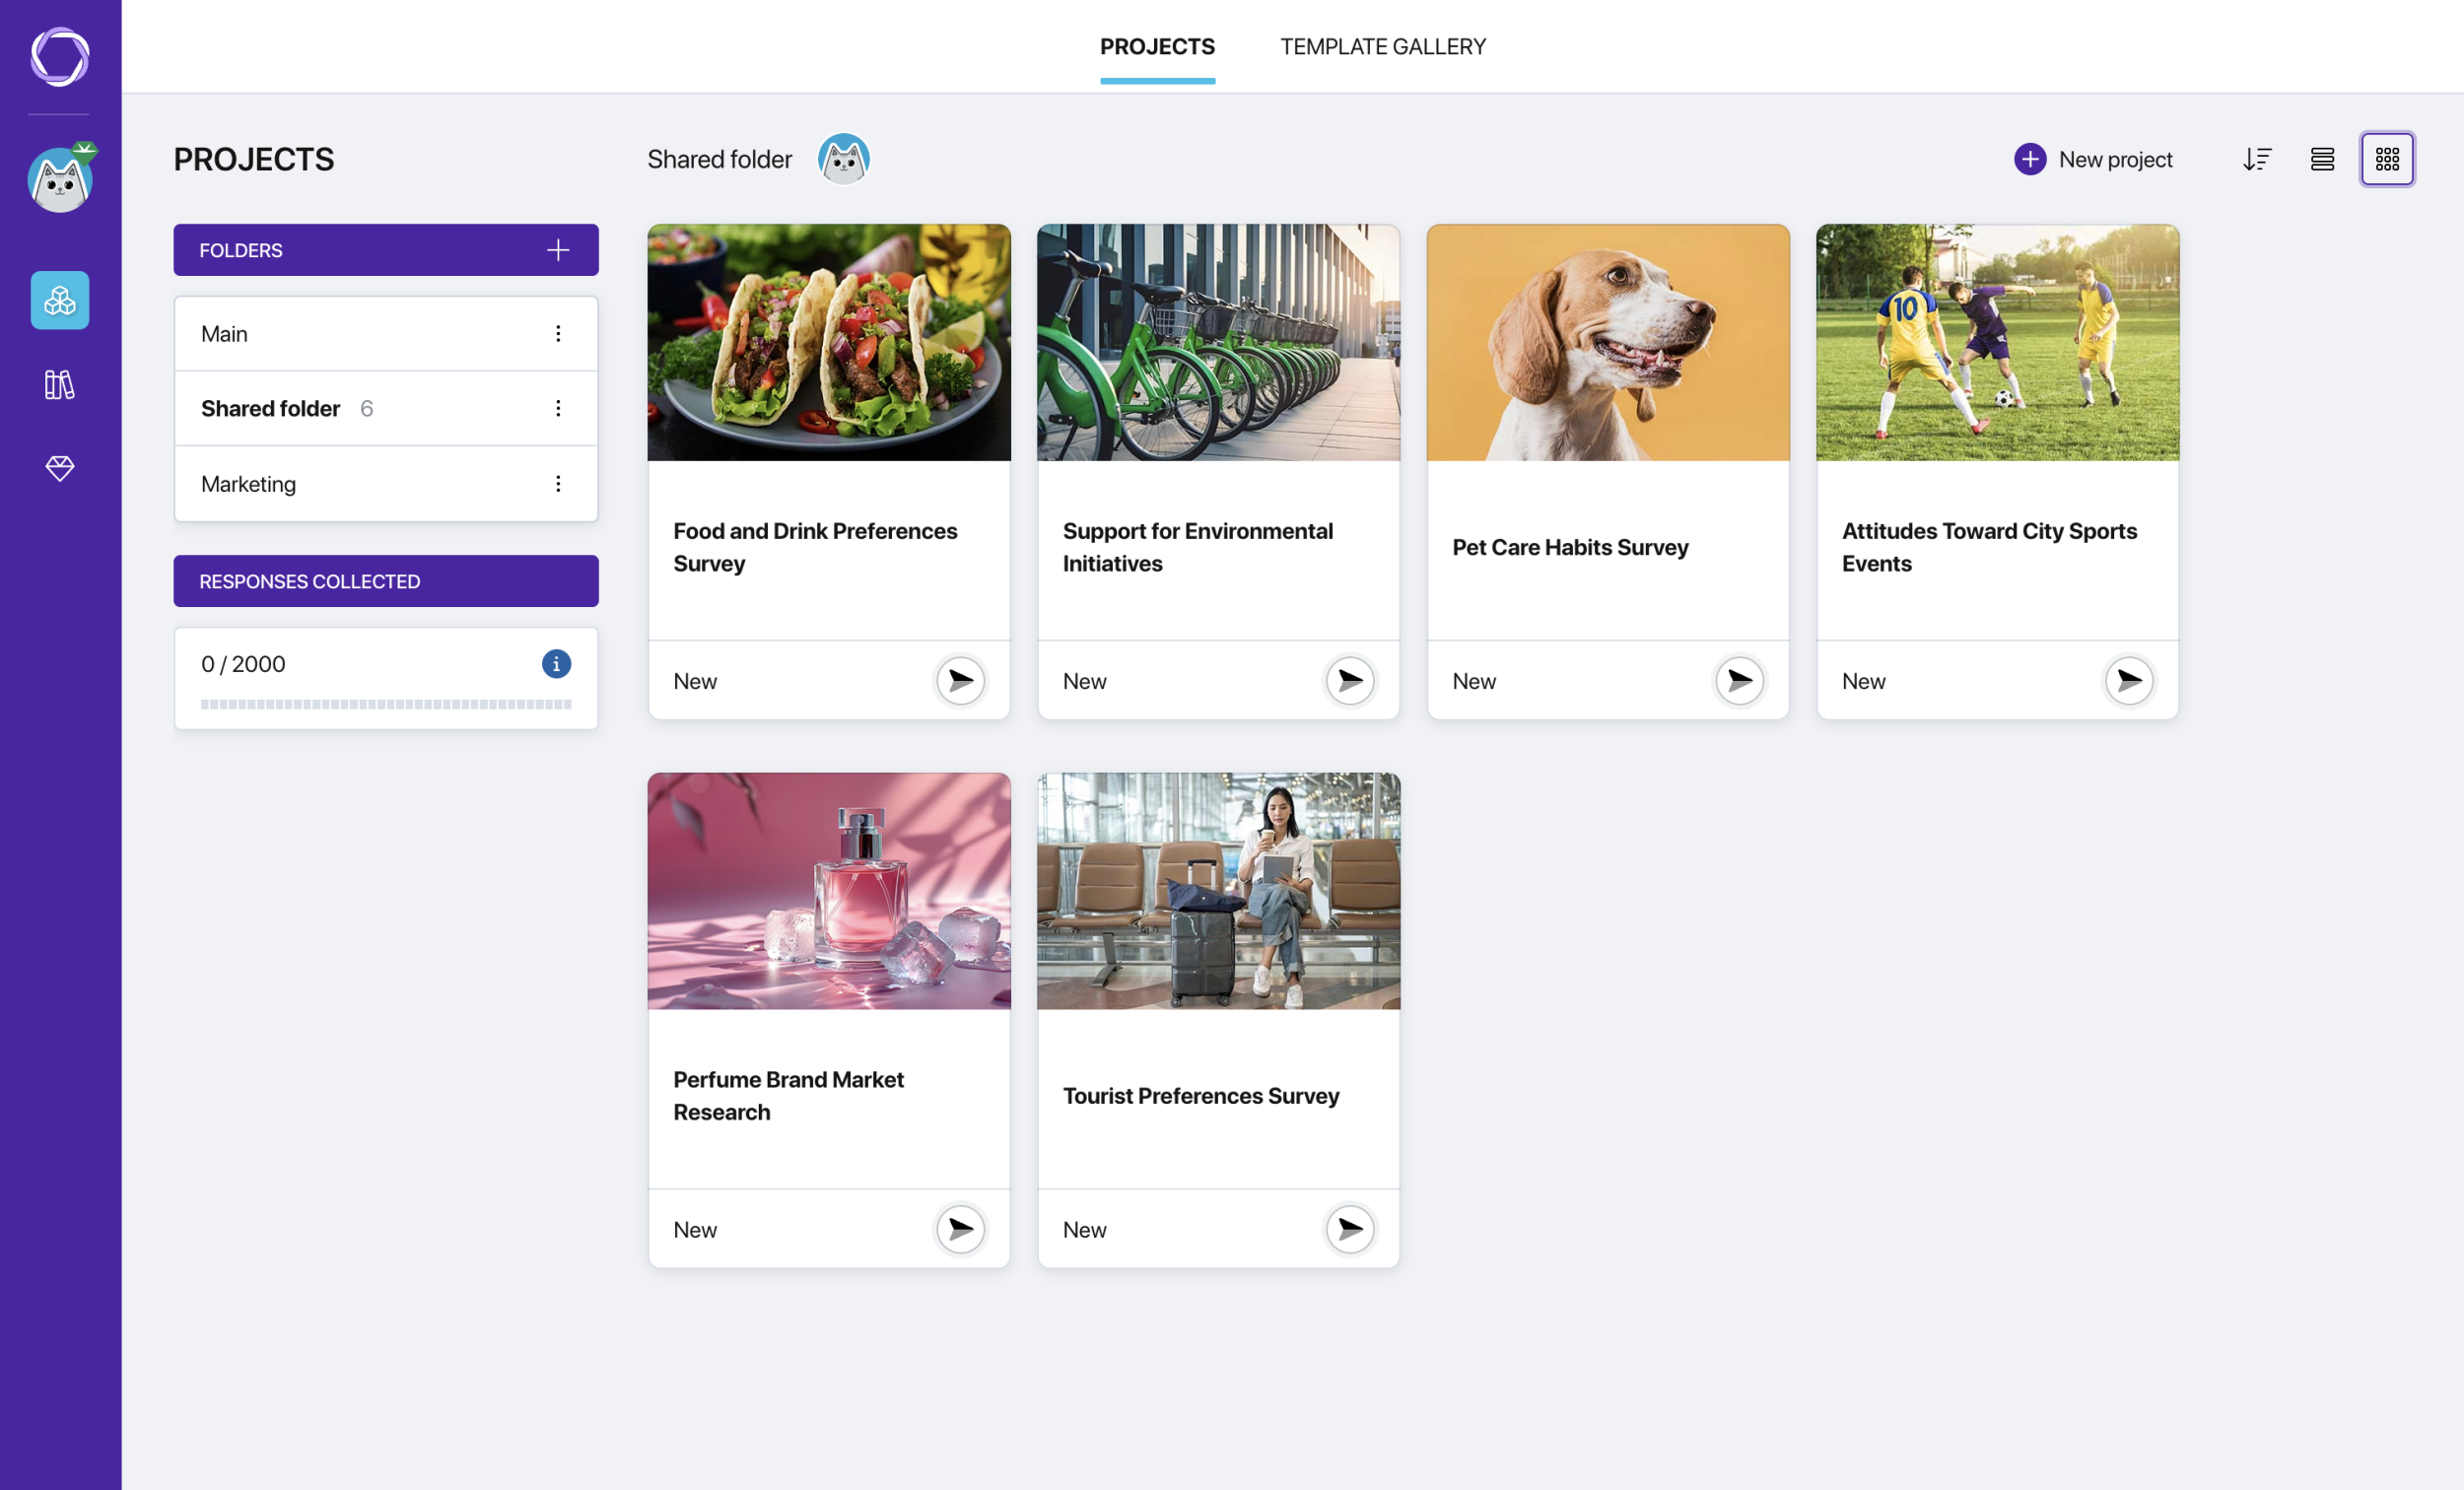
Projects page
What's next
After creating a survey you will find yourself in the builder — the main working screen of Pollsar. It consists of five stages:
- Builder — adding and configuring questions, branching logic.
- Style — choosing a visual theme and test-running the survey.
- Publish — setting up audiences, getting a link, embedding on a website.
- Results — statistics, response review, data export.
- Integrations — connecting webhooks, notifications, and external services.
Learn more about each stage in the Survey Builder section of the knowledge base.


