
Subscription and payment
This article explains how to subscribe to a paid plan in Pollsar: choose a plan, add a payment method, fill in billing details, and complete the payment.
How to subscribe
Go to the Plans page via the sidebar or through the profile menu → Finance. Choose a suitable plan and click Choose plan on its card. The payment window will open.
The payment window consists of two parts:
- Left — Payment. Contains two blocks: Billing Details (name or company name, address) and Payment Method (linked card). Both have a Change button for updating.
- Right — Plan Upgrade. A table with plan name, billing period, amount, and total. Below the table — notes about the next charge date and subscription renewal.
The Pay and Upgrade button becomes active only after billing details and a payment method have been added.
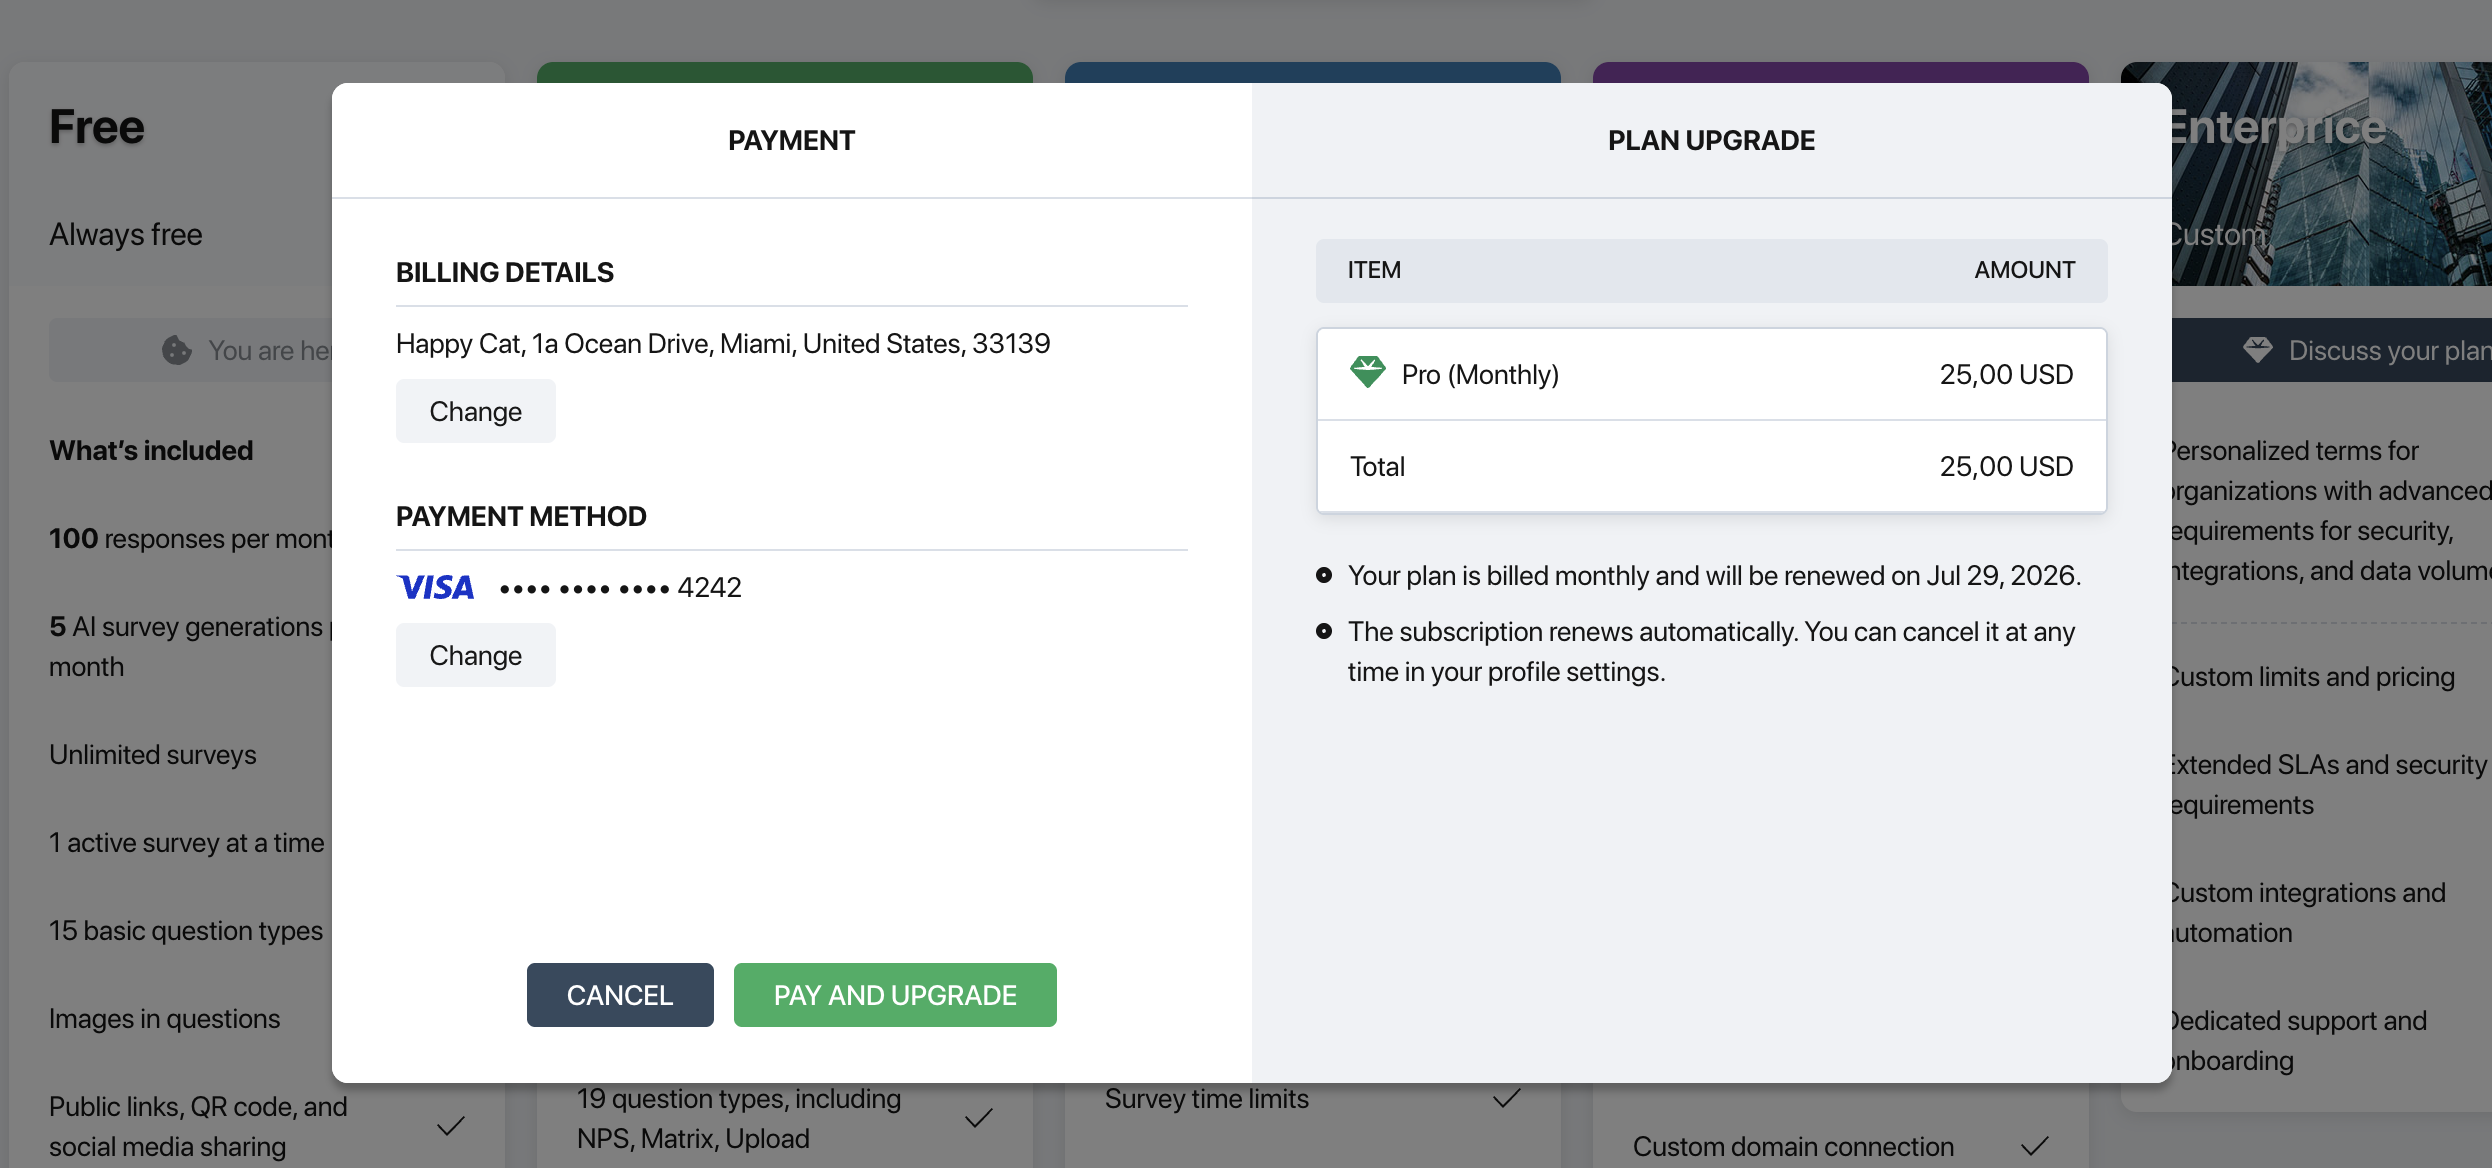
Payment window
Billing details
During your first payment you need to fill in your billing details: name or company name, address, city, country, and postal code. This information is used for generating invoices. You can update it later in the Finance section.
Payment method
Pollsar accepts Visa, Mastercard, Discover, Diners Club, JCB, and UnionPay cards. Payments are processed through Stripe — card data is never stored on Pollsar servers.
You can link multiple payment methods. One of them is marked as Primary — automatic payments are charged to this method. To remove the Primary method, first assign another one as Primary.
Monthly and annual billing
When selecting a plan, a billing period toggle is available: monthly or annual. Annual subscriptions come with a discount. You can switch from monthly to annual billing at any time through the Finance section.
After payment
After a successful payment you will see a confirmation — all features of the new plan are available immediately. If the payment fails, an error message will appear right in the payment window — no redirect to a separate page is needed.


